Friday, 9 May 2014

A Petite Pattisserie - Update

You may remember that I built a tiny patisserie for my sister when she opened a patisserie with her partner in Maitland (NSW) called Icky Sticky Patisserie. She set it into the counter of the patisserie for her customers to enjoy (the smaller ones in particular).

Since I was in Sydney for the Sydney Miniatures Show I stayed with my sister and now have an update on how the patisserie has faired. My sister came along to the miniatures fair and picked up a few new accessories for her patisserie. This included some cakes, a bunch of flowers and a little bit of greenery which were arranged in the patisserie with care.


If you are in the Newcastle/Maitland area, drop by to check out the tiny patisserie...and the cakes and great coffee!


The hole in the counter for the patisserie was prepared with a frame and glass (to keep little fingers out).


Behind, a ceiling was created which had an LED light, so the cakes could be seen.


The patisserie was then lowered back into place after its window display updates.


Anyone for real cake?

Tuesday, 6 May 2014

2015 Sydney Miniatures Fair

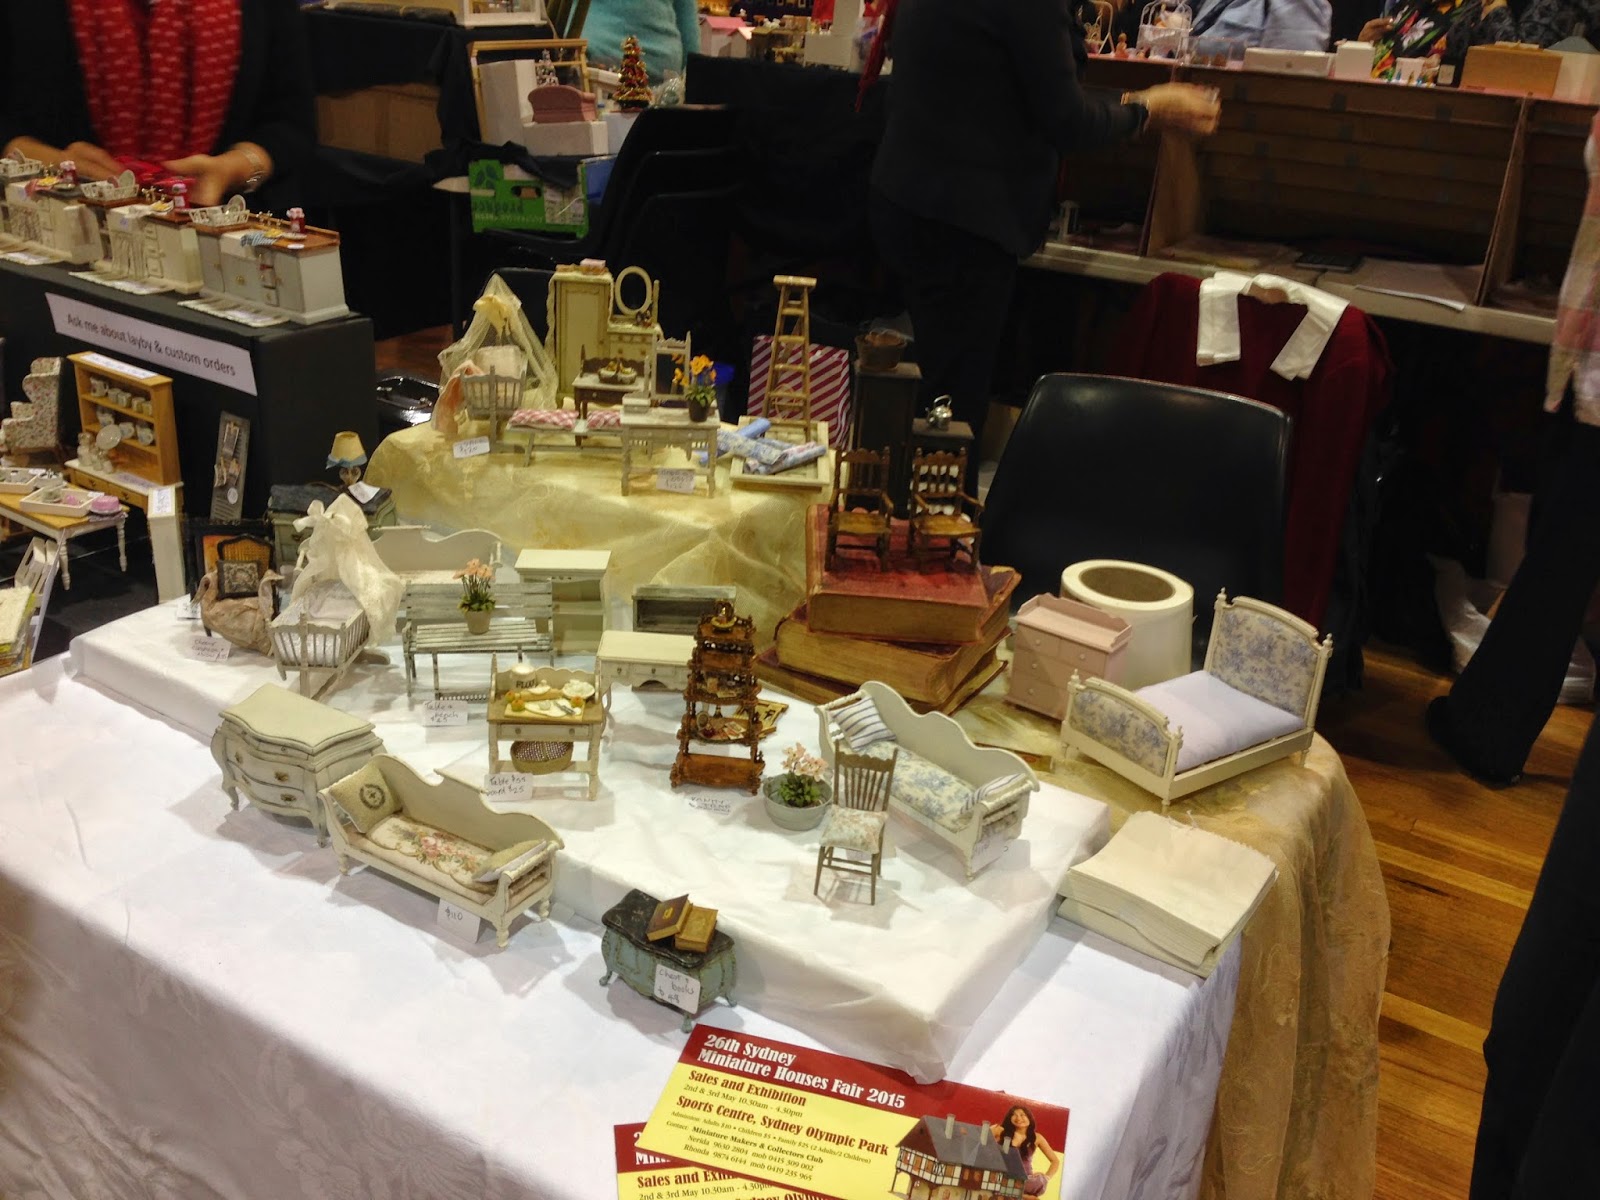
On the weekend I flew from Melbourne to visit the Sydney Miniatures Fair. The show was great, with many talented craftspeople selling their creations, as well as lots of bargains and miniature treasures to be found.


I met up with some fellow miniature bloggers, some of whom had stalls for the first time this year. This included Margeret from My Petit Parterre (above) with her beautiful faux aged French provincial furniture, also Norma was there from Make Mine Mini with her lovely range of kitchen settings (below) and Anna-Maria from The Shopping Sherpa.


There was a nice range of hand crafted furniture and miniatures as well, it was well worth the trouble.


For those who love smaller scales, Vicki Taylor from Just Quarters had a great range of furniture and accessories (below). I was able to buy an LED lighting system from her to use in my new half scale house.


Lilliput Miniatures had a great range of tudor furniture in both 1:12 and 1:24 scale, all hand crafted.


There were also some wonderful displays of dollhouse projects, including this beautiful French style mansion. French provincial really is in Vogue!


Some bargains were also had, and it was a great show!


Sunday, 27 April 2014

A Tiny Staircase Tutorial

I decided to redo the staircase for the Fairfield. The house comes with stairs, but they are positioned in an awkward spot and do not make the best use of space.

These are some images from around the web of other Fairfield dollhouses which have been built. You can see that the stairs cat the door way to the lounge in two.


I decided to alter both the stairs and the course they take in the small front hall. I also increased the size of the hall so that they would fit (it now encroaches more into the kitchen behind).


I cut up the kit to alter the direction of the stairs (hard to show how I did this in pictures). I also widened the stairs because they were far too narrow and looked out of scale.


I made new risers and treds out of fine and thin base wood.


I widened the final step to give a nice look.


I made new spindles out of match sticks which I carved simple notches into. I felt as though the stair spindles you find in the shops are not totally the right scale.


I made balustrading  with strips of balsa wood which I sanded to give it a round edge.


I think the finished stairs look much better, and more architecturally accurate.


This is how they sit in the hall now.


Thursday, 24 April 2014

Faux Brick Tutorial

I have decided to give my 1:24 dollhouse a nice red brick base. I decided to do so because I like the brick bases on these little houses and I wanted to imitate them.


I decided not to use the plastic prick sheets you can buy in the shops because I don't think they look realistic (they are difficult to paint). Also, it is hard to wrap them around corners in a realistic way. As such, I decided to make the bricks one by one instead. 

Below is an example of what can go wrong with plastic brick sheets if the measurements aren't quite right (I found this picture on Pinterest, the owner has done a beautiful job on the house in general).


I used egg carton to cut out individual bricks. Egg carton has the right texture to be brick of that scale. 


I then glued them on to the base individually, being careful to wrap them around the corners.


I then mixed up some red/brown paint (you could make the brick any tint you want, and painted two coats onto the bricks.


Then, in order show the grout in the bricks, I used timber gap filler. I rubbed it in between each brick (this was a little bit time consuming).


I then took a wet cloth and dabbed away all the excess gap filler.


I then gave the bricks a more realistic colour by dusting them with black, brown and green  chalk pastels (the green was for moss in the corners). After this I sprayed the bricks with some gloss sealer which you can buy at art shops and is usually used to seal paintings. This gave the bricks a bit of a shine/glaze which looks a bit more realistic and also removed any suspicious a viewer might have that they were made of cardboard.  


Below you can see that the right corner has been coloured with pastel, while the left corner hasn't. Notice how much more realistic the right side looks.


I then decided it would be important to have grilles/lattice between the brick posts which support the porch (these posts were not included in the kit, I added them using offcuts). These grilles are quite common, and look very nice.


I made them with some basewood strips I had cut.


They sit nicely between the porch brick posts, although now I am feeling doubtful that I have done them the right scale...I have a sneaking suspicion I should re-do them using slightly finer slats. Thankfully this won't take too long, and it is the small details that make a house!


Finally I used some off cut wood flooring to do the porch. All in all, it has made a good effect.


You can find more info on how to do brick in this way at one of my favourite blogs, Otterine's Miniatures (some more tutorials are referenced here too). 

Tuesday, 22 April 2014

New Project, New Scale - 1:24 Kit Bash

Because I have so little room, I have decided my next dollhouse project will be in 1:24 scale (half inch scale). This way I can assemble a whole dollhouse on my desk with ease, and store it on top of the bookshelf without issues.

I decided to start with a kit and do a "kit bash" to customise it. This is mainly because I don't have any power tools in my little apartment, so can't cut any walls in order to start from scratch. I wanted to do a classic victorian, so I chose the Fairfield by Greenleaf. I got one from eBay for a bargain $50 (including shipping to Australia!).

I have done quite a lot of image searching in researching Victorian houses, because I want to get an authentic look. So far I have found a few little farm houses which I am sure the Fairfield was based on!


I am not satisfied with the quality of the doors and windows so I also shopped around for some replacements. There are about three main options in the mass market for 1:24 scale windows and doors (including internal and external). In the end I chose Grandt Line for the authenticity and architectural detail.


This means I only have two project currently on foot, which is a nice change!  This includes this new 1:24 house and my Swedish house. The Swedish house has been coming along slowly (owing to it being in my parent's workshop, and me having little time to visit). It has recently acquired the first two of its five planned hinged facard doors, and its two main windows, so that is something!