Sunday, 7 September 2014

Victorian Iron Lace and a Little Porch

I haven't made a post in a very long time! This is mainly due to how busy I have been. Finally though, I have had some time to continue work on the half scale house. This week I finished off the porch and added some iron lace to cap the tower and the bay windows.

I added supports to create a gently sloping porch roof.


I then finished off the porch supports and glued them in place.


I glued the porch posts to the porch roof separately from the house in one unit, so that when I pain the house it will be easier. 


To finish off the exterior of the house, I wanted some decorative iron work. This is a picture of the roof line of a victorian house, with decorative iron lace. 


I designed a lace pattern myself using Adobe Illustrator, and had the pattern laser cut in 1mm card. 


I then capped the tower and two bay windows with the lace. 


The house is coming along nicely. Next I will be doing the shingling and making a chimney. Then I will be moving on to the interior! Slow and steady wins the race..

Tuesday, 8 July 2014

Some Progress and Some Pain

Today I continued with the outer trimmings of the half scale house. I felt like the eaves and gables were too wide, so I cut them. Soon I will give them support brackets.


As you can see here, the eave is shortened, and will be given a gutter and bracket. This makes it more realistic. 


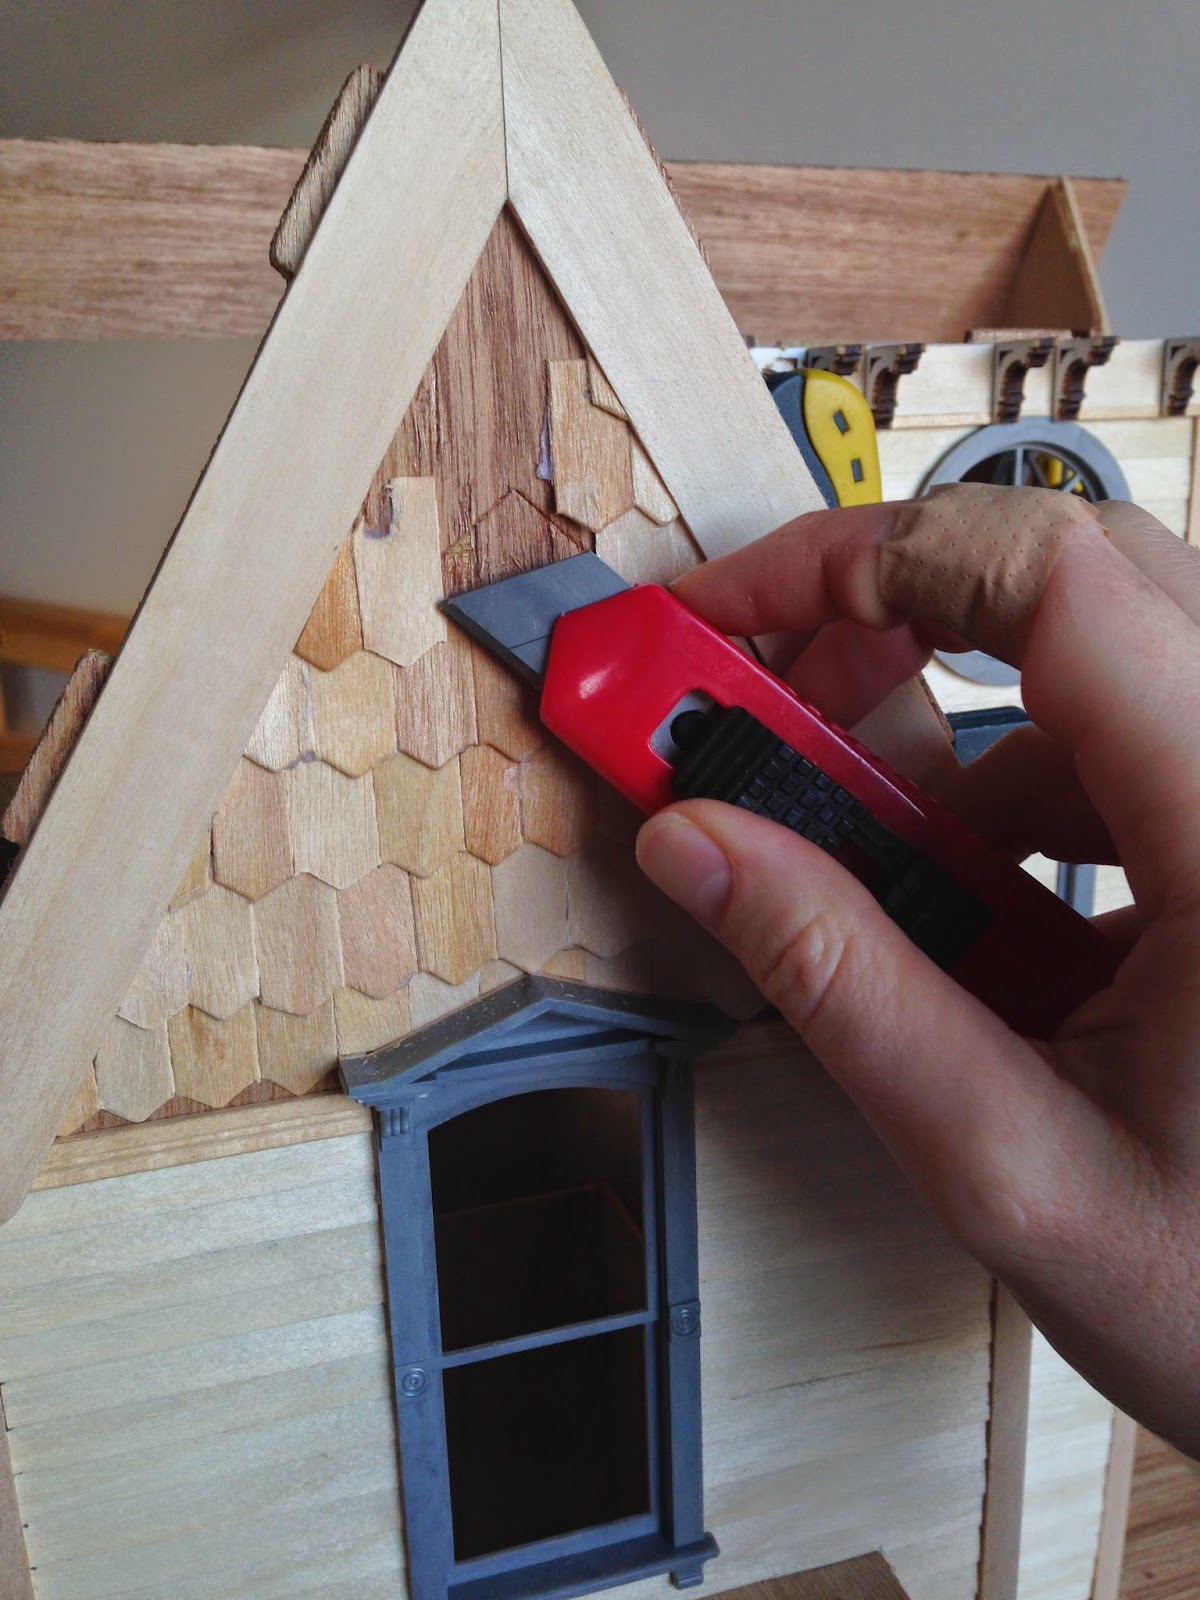
As you can see from the previous post, I had put shingles on the gable ends. After careful consideration I came to the conclusion that these were wrong. The singles were too big.


As such, I spent an hour prying them off. I had stuck them on with hot glue gun, and they were very difficult to remove. As a result of prying and jamming them off with a knife I stabbed my palm. While it was 7mm deep it was very clean, so didn't need stitches!  


I replaced the shingles with straight vertical weather boarding, which I think is finer, and more realistic.


Now the house is really taking shape.


It puts me in mind of an old farm house. I am now wracking my brain for colour schemes. I have found quite a few little houses which look like the Fairfield, though none so far who's colours I like.


Frankie Mayonnaise is bemused by the goings on.


Perhaps I will see some of you at the Melbourne Dollhouse Fair next weekend!

Friday, 4 July 2014

Exterior Cladding for the Half Scale House

I spent most of today finishing the weatherboards of the Fairfield. Since the kit does not come with any, I cut them all by hand. This was quite time consuming.


There is still a lot of work to do, but it is coming along.

Wednesday, 2 July 2014

A New Tower & Some Tiny Architectural Details

I have been working slowly away at the half scale house in the past few weeks. I want my little house to be a classic American style Victorian with some Neo Gothic and Second Empire influences. For example:


Unfortunately, with this style in mind, the pointed tower of the Fairfield was not suitable. So I decided to make some alterations to it. I wanted a square tower which is so common in Second Empire Victorians which have mansard roofs.


I kept the roof pieces, but trimmed the tops off and made side additions to give the square shape I wanted.


I then made the tower with flexible card. 


In addition to the tower I also needed some brackets and decorative architectural details. I searched quite widely and wasn't able to find anything of quality in 1:24 scale. So I decided to cut my own. Cutting by hand isn't so great because it does not produce uniform results so I decided to have some of my own designs laser cut. I have several pattern books of architectural details from last century, so I copied some of these designs in Adobe Illustrator. 


I then took this file to a laser cutting facility and had these patterns cut out of MDF and card. 


I made some of the brackets to be multi layered. I cut one layer of 3mm MDF and one of 1mm card, and glued them together to create more detailed brackets. 


The house is now starting to look quite good. Next I will begin the weather boards/cladding.


Wednesday, 21 May 2014

Making a Tiny Victorian Hall Lantern

I have been searching for some light fittings for my half scale dollhouse, however, in this scale I have not been able to find any affordable lights which are not clunky and look out of scale. I did find some that were nice but were about $150 - $200 each, which is too much if you want to light a whole house. 

So, I decided to make my own. The first light fitting I need to make it the entrance hall light because it will be closest to the lighting pack (which will sit under the stairs). 

I decided on a Victorian hall lantern. I love these lanterns so much! 


There are many different styles, but the common elements include leaded stain glass in simple geometric patterns, and quatrefoil patterned edging. 


To make my little lantern, I first found some cheap, thin bangles.


I also tracked down some fancy jewellery wire with a nice gothic-type pattern. 


I cut the bangle into 8 equal lengths to form the top and bottom frame of the four sided lantern.


I then cut small sections from the decorative wire and used them to cap the edges of the frame, top and bottom.


I then bent two lengths of wire for the "handle" on the top.


I then glued these two lengths on as you can see below.


Once the top and bottom frames were done I cut four equal rectangles from acetate for the glass. These glued into a cube easily using a plastics glue. 


Then I popped the top and bottom framing sections onto the acetate cube.


Next I used a length of gold tape to use for the leading (bought from a gold supply shop). This is thin lead strip tape with an adhesive backing which can be cut into very thin strips and simply stuck down to look like leading on glass. I also used it to cap the four side edges of the lantern.


The use of super glue to glue the metal frame to the acetate oxidises the acetate, thus making it a little cloudy. I personally like this because I think it makes the glass look old. 


I bought glass paints to colour the acetate however (after spending a lot of money on the paint) changed my mind because it did not give a smooth finish. Instead I bought coloured cellophane, cut it into pieces and glued it to the inside of the lantern.


The outcome is surprisingly real and effective!


Im still debating whether I have made the lantern the right scale for the hall. I feel it might be a tiny bit big. I guess it will become more clear once the other finishes are in.

I have been thinking of making some more to sell on Etsy (in both 1:12 and 1:24). Thoughts?