To decorate your tree you will need a little bit of time and patience.

To decorate the tree you will need:
- beads of several kinds in the shapes and colours you like;
- jewellery wire;
- pliers (preferable a small pair of long nose with rounded tips);
- super glue (or glue which will glue metal to metal, plastic to metal).
To make the little Christmas tree table you will need:
- miniature table you like;
- silk fabric in two shades (silk responds the best to starch and also has a shine with looks realistic at scale);
- spray starch;
- 1mm card;
- a few more pieces of lycopodium moss;
- smallest ribbon you can find;
- plastic based all purpose glue (such as "Tarzan's Grip", which is best for glueing fabric).

Using the jewellery wire and pliers bend and cut the hangers for each bauble. These will be glued into the beads. Cut the lengths slightly longer than you need because it is esier to trim excess than to fiddle with a tiny piece.

I modified some of the beads by painting them purple and red with glass paint. Glass paint is perfect because it has that glossiness that Christmas ornaments usually have.

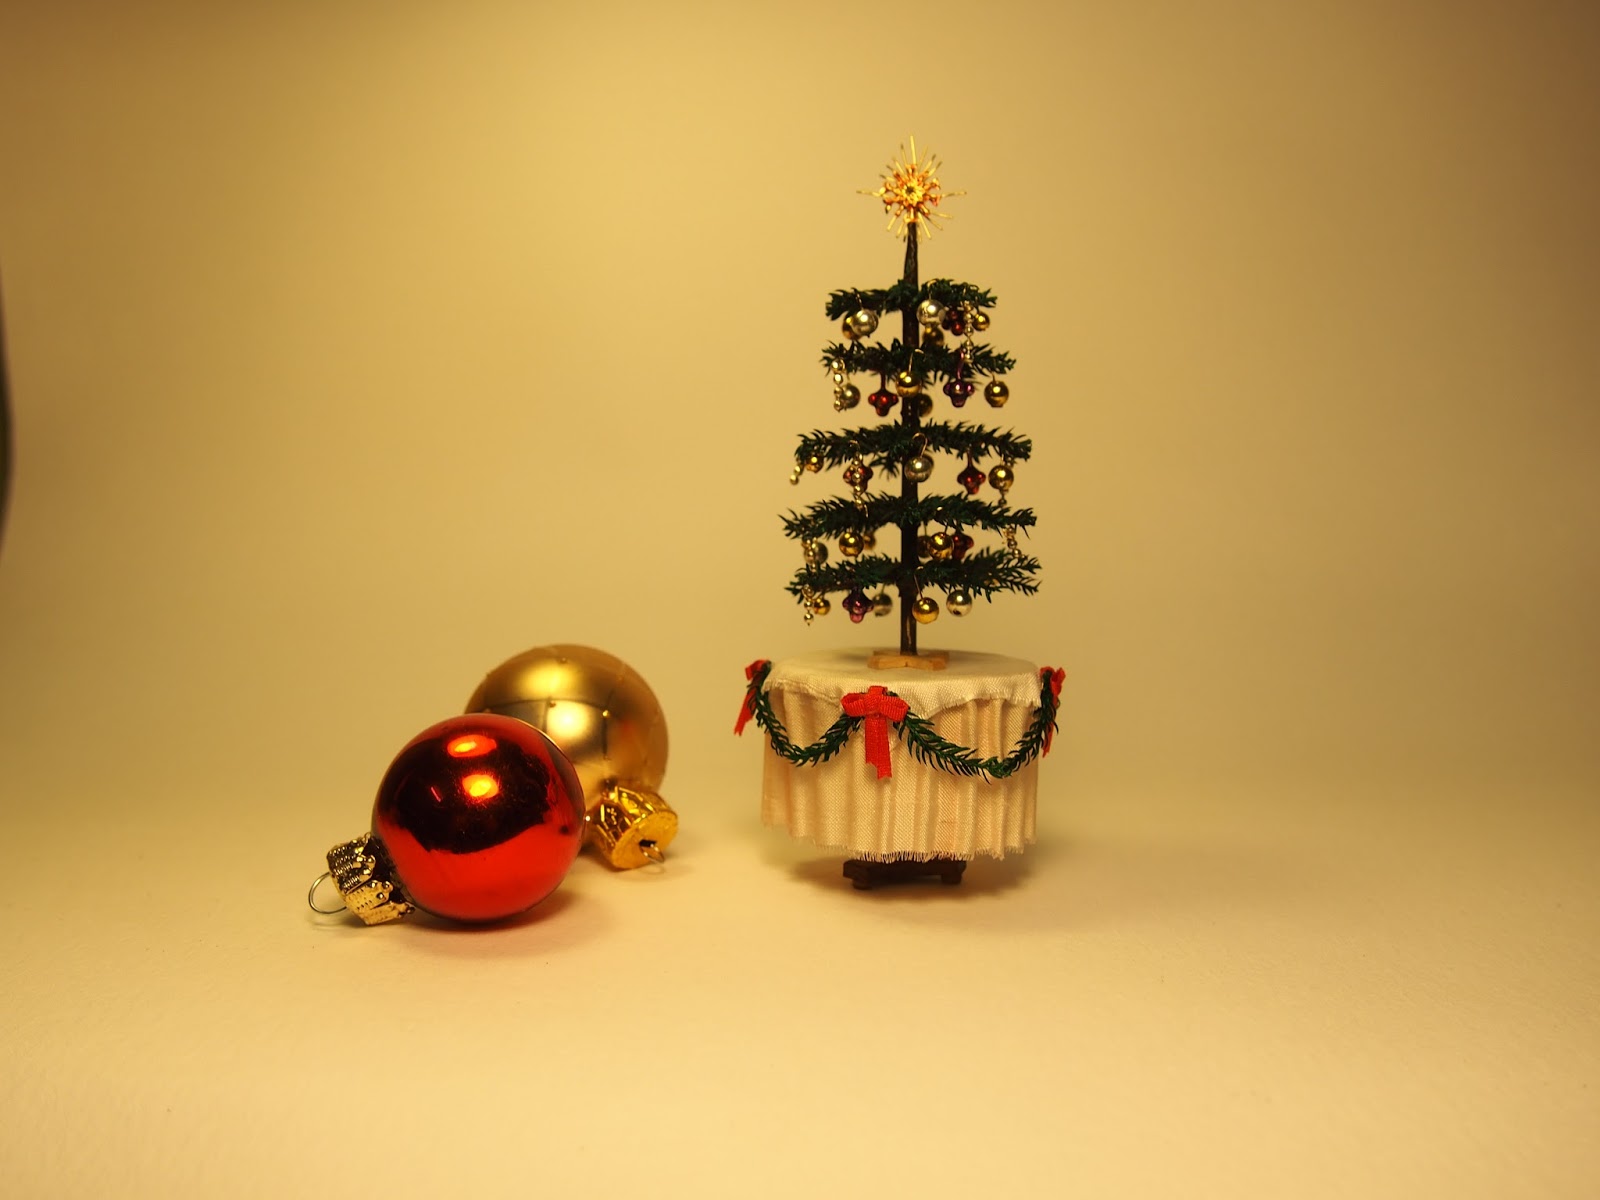
Here you can see a selection of baubles I made for my tree.

To make the star I used two of the same type of beading thingy. This type of thingy is common and easy to find. Many mini makers use them the base for 1:12 candle sticks.

I cut one up to expose the centre star and glued it onto the top of the other. I then glued strands of the jewellery wire behind it for star shine.
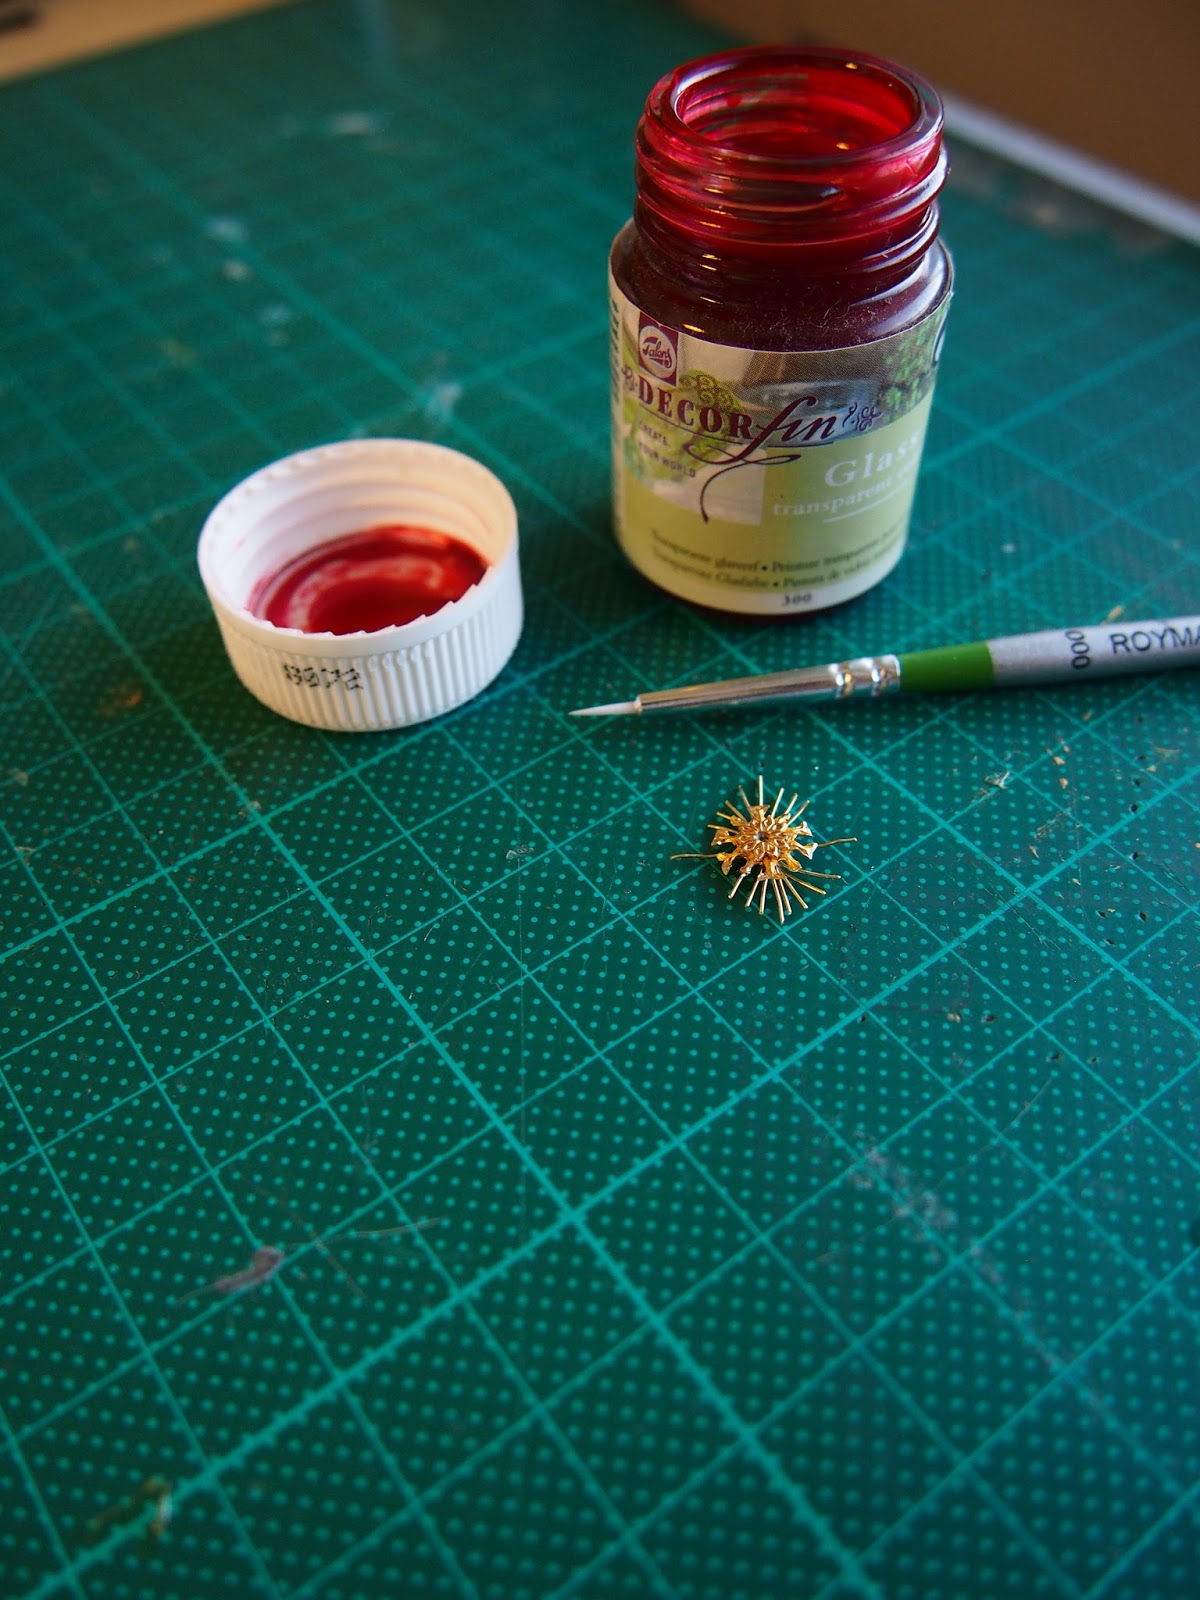
I then used the glass paint to add some red highlights to the star.
Once the decorations are finished place them one by one in the tree. When you like their position, dap a drop of super glue on to glue them in place.
Table:
Start by cutting a circle of card the same size as the top of your table. Using the method you like best, pleat a straight strip of the silk (the height of your table) and glue it around the outside of the card. like below.

To work with ease, use a toilet roll or equivalent holder as a stand. This will make it much easier to handle without making dirty.

Once the pleats are finished, take a square piece of silk in another tone and spray with starch. Then drape it over the top of the card and hold down the sides to make it look realistically draped. Once it has dried, dap small amounts of the glue to hold it in place on to the card.

Make some small bows with your ribbon. I did this by folding and glueing several pieces rather than actually tying a real bow.

Make the garlands for the table in the same way you make the branches of the tree: with lycopodium glued to wire. glue the bows on top when you're done.

And you're done!

Te ha quedado monisimo
ReplyDeleteMuchas gracias
Un abrazo
Maite
Muy bonito. Gracias por el tutorial.
ReplyDeleteSuch a great idea!
ReplyDeleteBeautiful!
ReplyDeleteMe encanta como te ha quedado!!! Muchas gracias por el paso a paso!!!!
ReplyDeleteBesos.
Charmant!!
ReplyDeleteHello Emily,
ReplyDeleteIt is beautifully done! Great work!
Big hug
Giac
So cute! I love your decorations, and the use of glass paint is a great idea. I particularly like your star. I hope I can remember this when I get around to making my own mini Christmas trees. Have a great Christmas and new year.
ReplyDeleteChristmas ornaments are one of those things I keep meaning to make but never get around to. This is the motivation I need. They all look lovely
ReplyDeleteI definitely need one of those for my victorian house. Jealous yes!
ReplyDelete