Wednesday, 31 July 2013

1:144 Window Boxes: Easier Than They Look!

I decided my little terrace house needed some finishing touches, so I decided to try and replicate the window boxes of the real house.


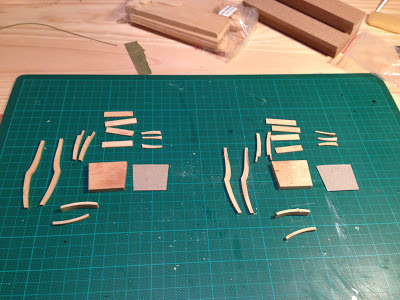
I decided to make them in white, because this would stand out better on the miniature house. I used a hobby plastic strip which was square and hollow.


I cut it into small lengths. Then I cut one of the four sides off so that the lengths were three sided and open on one side. Then I cut small squares of paper to block up each side and make a tub. 


Then I filled the tubs with clear drying PVC hobby glue and stuck in some little bits of shrub and flowers I bought from the hobby shop in the model train scenery section.


This part required tweezers.


The result was quite effective and realistic.


I also added a red front door for good measure. I have ordered some window shutters from a model train hobby supplier, so when they come along, the house will be quite complete!


Monday, 29 July 2013

North Melbourne in Miniature - Another 1:144 House

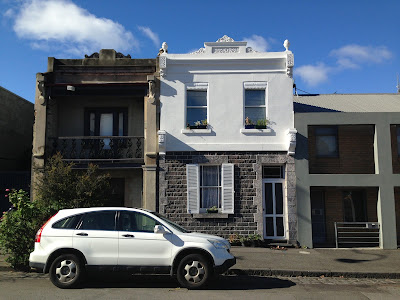
I decided to make another little 1:144 house this week. There is a pretty white terrace house on my street and I decided to copy it. 


I bought some fittings online this time from Grantline to give some more realism. 


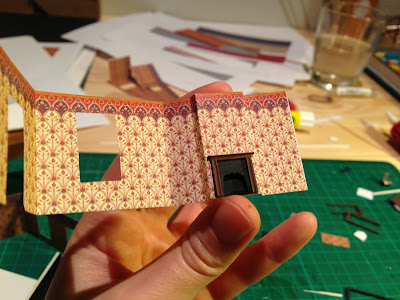
I printed off wallpaper in the same way as last time. In the comments on my last post I was asked what type of printer I used. I used a standard large commercial office printer, the type they have in copy/office supply shops. It isn't the best finish (a little shiny), but the detail is good enough.


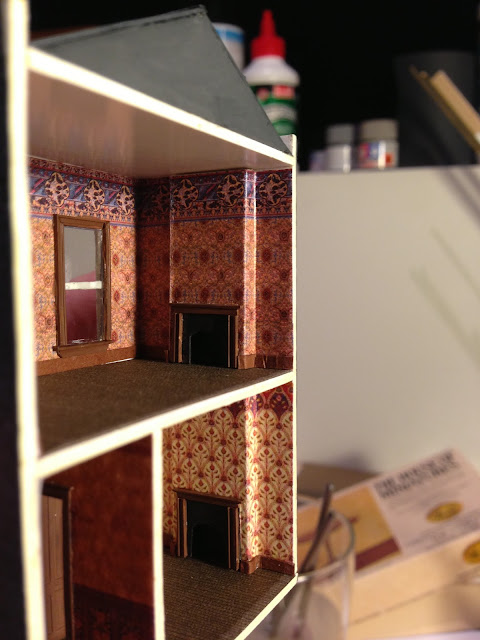
I completed each of the rooms before I slotted them into the card shell. That is I folder and cut the wallpaper, made the fireplace and did the architraves. It just gets too difficult to work inside a tiny room with these details.


I used some plastic hobby strips for the architraves and fireplaces, cut them to size and painted them brown. This looks more real than brown cardboard. I made the rest of the house from 1.5mm white card and grey paper (for the blue stone bottom half and sides). 


For the urns on the parapet I searched for an appropriate shaped object, and found earring backings. They were perfect for the purpose so I glued them on and painted them white.


Im still waiting on some shutters to finish it off (which I have ordered) but here is a  compare picture in the mean time. 

Wednesday, 24 July 2013

The First Daffodils of (Early) Spring

It is daffodil time in south eastern Australia right now. This is the lovely time in late of winter where the daffodil and jonquil bulbs think it is warm enough to flower. In light of this, and the fact that daffodils are my boyfriend's most favourite flower, I decided to purchase some hand made miniature daffodils from Etsy. I found some very realistic flowers from MostlyArt.


The flowers look lovely in the Biedermeier parlour of the Georgian house. 


They also look nice next to the John Glover painting. I think they will stay there.


Also, the outside of the Bungalow is coming along nicely. 


It is fun to see a little house at the end of the corridor when I get to the top of the stairs. 


Monday, 15 July 2013

A Tiny New Side Project

This week I have discovered a new scale: 1:144. This size is a house which could be a dollhouse for a dollhouse. I was inspired by the little houses in Hobart, Tasmania. 


I made it out of 1.5 mm card. 


I wanted a realistic interior, so I found some wallpaper images on the internet, saved them, scaled them down and printed them off in the correct scale.


I cut the paper out and folded it in to shape for the rooms. 


I made the fireplaces, skirting board and architraves with brown coloured paper.


The tiny dormer window was a bit of a challenge. 


Perhaps I will try some furniture, though I think that will be a little more difficult!


Wednesday, 3 July 2013

Biedermeier Furniture for the Georgian Parlour

I realised the other day that the parlour of my Georgian house has been empty for too long. I built it and never actually got to furnishing it (I think building rooms and houses is my forte rather than furniture).


I didn't want to spend too much, but still wanted something nice which didn't look too factory made/mass produced. So I bought a Biedermeier living room kit from Mini Mundus


It was second hand off eBay, so it was a little old, but all the parts were there. The foam had long since crumbled, so I used some extra packing foam I had lying around instead.


I rejected the upholstery material from the kit because it was cheap nylon and chose instead to use some linen I had from an old shirt. It was the right kind of blue for my parlour. I also did some research and found that Biedermeier sofas often had stripped upholstery. 


The pieces weren't the perfect size, or the best quality wood, so some chamfering and sanding was necessary.


I finished the wood with many coats of french polish.


The finished product fits perfectly with the colour and style of the parlour. I am very pleased it worked so well. 


I am now looking for some little finishing touch accessories to make the room look realistic - vase with flowers, a tea set and cake, and maybe some papers for the writing desk!


This edited picture makes the room look real too, which was fun!